Jenkins Server Example
This is an example on building a JX3 Google/GSM environment from scratch which includes a Jenkins server and the import of a pipeline. It will utilize DNS (jx3rocks.com), TLS, Let’s Encrypt certificates, and additional Jenkins plugins and installer resources. It is inteded for an audience already familiar with Jenkins X operability and focuses on an example of actual commands required to build and operate the environment. Additional information regarding using Google as the provider for this example can be found under Google Cloud Platform Prequisites.
💡 This doc has been designed to build the Jenkins server under the Google cloud platform. The Jenkins server configuration steps have also been tested under Azure and Amazon cloud environments.
Initialize the Infra and Cluster Repos
Using a command-line based approach, the example employs a process modeled after the doc Setup Jenkins X on Google Cloud with GKE, and will use Google Secret Manger. It requires installation of Git and Hub command line tools.
The following are the values used for the creation of the Infra and Cluster repos:
Repo Source:		jx3-gitops-repositories
Infra Repo:		jx3-terraform-gke
Cluster Repo:		jx3-gke-gsm
Git Organization:	jx3rocksorg
JX3 Root Directory:	$JX3HOME                ## i.e. /home/user
Building infra repo: https://github.com/jx3rocksorg/jx3-terraform-gke
cd $JX3HOME
git clone https://github.com/jx3-gitops-repositories/jx3-terraform-gke.git jx3-terraform-gke
cd  jx3-terraform-gke
git remote set-url origin https://github.com/jx3rocksorg/jx3-terraform-gke.git
hub create -p jx3rocksorg/jx3-terraform-gke
git commit -a -m "chore: Initial"
git push -u origin main
Buidling cluster repo: https://github.com/jx3rocksorg/jx3-gke-gsm
cd $JX3HOME
git clone https://github.com/jx3-gitops-repositories/jx3-gke-gsm.git jx3-gke-gsm
cd jx3-gke-gsm
git remote set-url origin https://github.com/jx3rocksorg/jx3-gke-gsm.git
hub create -p jx3rocksorg/jx3-gke-gsm
git commit -a -m "chore: Initial"
git push -u origin main
Manage URL format
This example uses external DNS with subdomain and URLs will have a root of web.jx3rocks.com. To avoid including the default string "-jx" in the URLs, the example blanks out the spec:ingress:namespaceSubDomain value (".") in the jx-requirements.yml file. To eliminate having non-unique URLs after doing this type of update, an additional spec:environment:ingress:namespaceSubDomain line item is added ("-stg.") for the staging environment.
File:$JX3HOME/jx3-gke-gsm/jx-requirements.yml
  environments:
  - key: dev
  - key: staging
    ingress:
       namespaceSubDomain: -stg.
  - key: production
  ingress:
    domain: ""
    externalDNS: false
    namespaceSubDomain: .
Define Jenkins plugins and installers.
The default Jenkins server installation is a minimum configuration and generally requires additional installers and plugin components for the your specific Jenkins project to operate. The Jenkins components (i.e. plugins, installerss, etc.) are defined in 3 locations; Chart, System, and User configurations which get loaded in that order. During the build process settings get inherited and can be modified but depending on the end config how to make modifications may vary. This example takes into account the default configuration based upon the Chart and System settings. It will only require small additions to the configuration which is done at the User level. To make these config changes will require the modification of the User values.yaml file.
💡 Currently there is an issue where the Jenkins URL does not resolve to an IP address. To address this issue, it is imperative to have the
ingressClassName: nginxincluded in the values.yaml file.
File: /tmp/values.yaml - Config Scripts
controller:
  ingress:             ## Required versionStream DNS/Ingress break fix
    ingressClassName: nginx
  JCasC:               ## Example of building an installer
    configScripts:
      mystuff: |
        tool:
          nodejs:
            installations:
            - name: "NodeJS"
              properties:
              - installSource:
                  installers:
                  - nodeJSInstaller:
                      id: "15.7.0"
                      npmPackagesRefreshHours: 72
  additionalPlugins:   ## Additional plugins for example
    - pipeline-stage-view:2.24
    - nodejs:1.5.1
Initialize Jenkins server configuration
jx gitops commands are used to create the Jenkins server configuration. More information can be found under Adding Jenkins Server into Jenkins X. The example uses the following command sequence:
cd $JX3HOME/jx3-gke-gsm                             ## cluster repo root
jx gitops jenkins add --name jx-jenkins             ## add Jenkins
jx gitops helmfile resolve --namespace jx-jenkins   ## resolve charts references (optional but helps later on in editing)
cp /tmp/values.yaml helmfiles/jx-jenkins            ## Update tool config
Push initial changes to cluster repo
All the customizations for the cluster repo are now propagated.
cd $JX3HOME/jx3-gke-gsm
git add .
git commit -a -m “chore: Jenkins example init”
git push
Build the infrastucture with Terraform
The following TF_VAR environment variables are set prior to running Terraform commands:
TF_VAR_gcp_project=<google project>
TF_VAR_apex_domain_gcp_project=<google project>
TF_VAR_jx_bot_username=<git username>
TF_VAR_jx_bot_token=<git token>
TF_VAR_tls_email=mymail@jx3rocks.com

TF_VAR_apex_domain=jx3rocks.com
TF_VAR_subdomain=web

TF_VAR_gsm=true
TF_VAR_cluster_name=jx3web
TF_VAR_cluster_location=us-east1-b
TF_VAR_jx_git_url=https://github.com/jx3rocksorg/jx3-gke-gsm.src.git
TF_VAR_lets_encrypt_production=false
TF_VAR_force_destroy=true
Additional detail on Terraform settings can be found under Google Terraform Quickstart Template
Commands to build intrastructure:
cd $JX3HOME/jx3-terraform-gke
bin/create.sh                # Performs terraform init, plan and apply
Enable prod certificate
This example employs TLS and accesing Jenkins from a browser requires a valid production certificate. It should be noted that TLS is not supported with automated domains (i.e. nip.io). The process will begin by installing a Let’s Encrypt test certicate. After the initial build completes and is successful, it’s best to ensure that the test certificate is ready (READY=True) before enabing the production certificate. You can find more information regarding this subject under TLS and DNS.
## Set credentials
gcloud container clusters get-credentials jx3web --zone us-east1-b
## Set jx namespace
jx ns jx
## Check certificate
kubectl get cert -n jx
NAME                     READY   SECRET                   AGE
tls-web-jx3rocks-com-s   True    tls-web-jx3rocks-com-s   39m
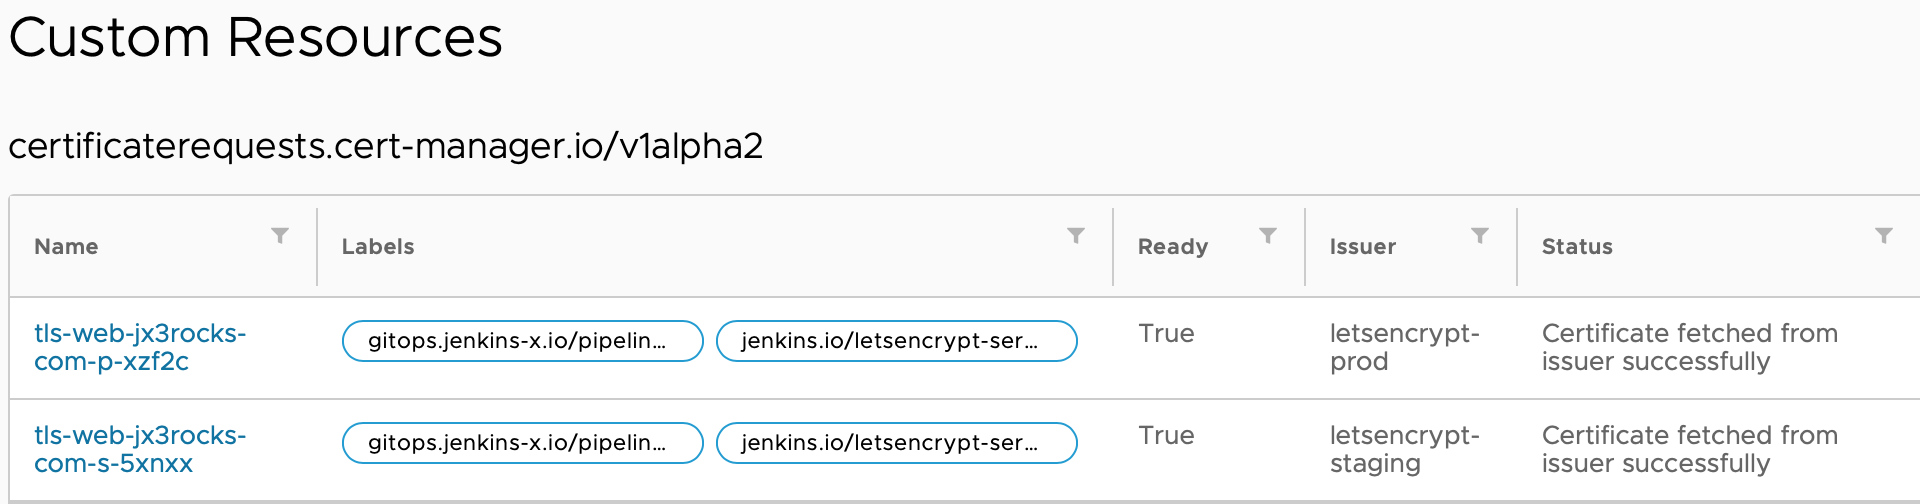
You can also use Octant to check certificate status.
Enabling the production certificate will require updates to both infra (jx-terraform-gke) and cluster (jx3-gke-gsm) repos. The commands to create the prod certificate are:
cd $JX3HOME/jx3-gke-gsm
git pull         ## Make sure local cluster repo is up to date
cd $JX3HOME/jx3-terraform-gke
export TF_VAR_lets_encrypt_production=true
terraform apply -auto-approve
cd $JX3HOME/jx3-gke-gsm
git commit --allow-empty -m "Dummy commit"
git push
jx admin log     ## Make sure it completes before proceeding
git pull         ## Once successful refresh local cluster repo
The $JX3HOME/jx3-gke-gsm/jx-requirements.yml file’s TLS production setting should now be true.
  ingress:
    domain: web.jx3rocks.com
    externalDNS: true
    kind: ingress
    namespaceSubDomain: .
    tls:
      email: mymail@jx3rocks.com
      enabled: true
      production: true
Once again, the example checks the certificates status till the production certifacte is ready before proceeding.
kubectl get cert -n jx
NAME                     READY   SECRET                   AGE
tls-web-jx3rocks-com-p   True    tls-web-jx3rocks-com-p   39m
tls-web-jx3rocks-com-s   True    tls-web-jx3rocks-com-s   86m
You can also use Octant to check the production certificate.
Sign on to Jenkins
After production certificates become ready, access to the Jenkins site: https://jenkins.web.jx3rocks.com is now available. The site has been configure with an admin user id and to obtain the admin user password the following commands are used:
kubectl get secret -n jx-jenkins jenkins -o jsonpath="{.data.jenkins-admin-password}" | base64 --decode; echo
Deploy Jenkins Pipeline
To deploy a Jenkins Pipeline requires a Jenkinsfile file and can be created through either a jx project import or jx project quickstart command. You can find more detail in Importing project or creating quickstarts. This example creates a file Jenkinsfile in a new project directory (jx-example-node) and executes the jx project import command.
File: ~/jx-example-node/Jenkinsfile
pipeline {
    agent none
stages {
        stage ('First') {
            agent any
            steps {
                echo "First dummy stage"
            }
        }
        stage ('Input') {

            steps {
                script {
                    myStage = input message: 'What service type do you want to run now?', parameters: [choice(choices: 'Create\nUpdate', description: '', name: 'Stage')]
                }
                echo myStage
            }
        }
stage('Stage1') {
            when {
                expression { myStage == 'Create' }
            }
            steps {
                echo "Running Service: Create"
            }
        }
stage('Stage2') {
            when {
                expression { myStage == 'Update' }
            }
            steps {
                echo "Running Service:Update"
            }
        }
}
Import the project to deploy the pipeline
jx project import --git-token <token>  \
                  --git-username <git user> \
                  --org jx3rocksorg \
                  --jenkins jx-jenkins \
                  --dir ~/jx-example-node \
                  --name jx-example-node \
                  --batch-mode
Restarting Jenkins pod after pipeline deployment.
When the above pipeline is deployed it may be necessary to restart the Jenkins pod berfore you see it appear in the Jenkins dashboard.
kubectl delete pod jenkins-0 -n jx-jenkins ## Restarts Jenkins pods
Adding Github Webhook (optional)
The current default configuration of JX3 for the import of Jenkins projects does not include the creation of a GitHub webhook for automated pipeline execution. You can use an GitHub API call to set up a webhook to provide a mechanism to kick off a pipeline when there’s an update to the project’s repo. Below is an example of the API call for this Jenkins configuration and import project example.
curl -X POST \
  https://api.github.com/repos/jx3rocksorg/jx-example-node/hooks \
  -H 'authorization: token <API_TOKEN>' \
  -H 'cache-control: no-cache' \
  -d '{
  "config": {
    "url": "https://jenkins.web.jx3rocks.com/github-webhook/"
  },
  "events": [
    "issues",
    "issue_comment",
    "pull_request",
    "pull_request_review",
    "pull_request_review_comment",
    "commit_comment",
    "push",
    "release",
    "create",
    "delete"
  ]
}'
Following this setup subsequent changes to the Jenkins project repo’s main, master, and PR-* branches should now automatically kick off a pipeline.
You could also set up a GitHub webhook for the Jenkins project using the GitHub UI. More details can be found at https://docs.github.com/en/developers/webhooks-and-events/creating-webhooks.
Removing the Jenkins server and repo
The Jenkins server definition and repos can be found in the$JX3HOME/.jx/gitops/source-config.yamlfile. This example’s file is the following:
apiVersion: gitops.jenkins-x.io/v1alpha1
kind: SourceConfig
metadata:
  creationTimestamp: null
spec:
  jenkinsServers:
  - groups:
    - owner: jx3rocksorg
      provider: https://github.com
      providerKind: github
      repositories:
      - name: jx-example-node
    server: jx-jenkins
  slack:
    channel: '#jenkins-x-pipelines'
    kind: failureOrNextSuccess
    pipeline: release
Commands to remove Jenkins resources and repo:
rm $JX3HOME/jx3-gke-gsm/.jx/gitops/source-config.yaml
rm -rf $JX3HOME/jx3-gke-gsm/helmfiles/jx-jenkins
sed -i '/jx-jenkins/d' $JX3HOME/jx3-gke-gsm/helmfile.yaml
hub delete -y jx3rocksorg/jx-example-node
git commit -a -m "chore: remove jenkins"
git push
Troubleshooting
Sometimes Jenkins requires attention due to invalid plugin versions and/or syntax. The following commands are helpful in debugging:
kubectl logs -f jenkins-0 -n jx-jenkins -c init       ## View init container
kubectl logs -f jenkins-0 -n jx-jenkins -c jenkins    ## View jenkins container
kubectl delete pod jenkins-0 -n jx-jenkins            ## Restarts Jenkins pods
Feedback
Was this page helpful?
Glad to hear it! Please tell us how we can improve.
Sorry to hear that. Please tell us how we can improve.